电视终于到了,实在是不容易呀。五月底就下了订单,等了三个月才到,就是为了省几百块钱。
这电视机的架子也是好事多磨,在Amazon上定的,免税、免运费,以为是靠得住的,第一次寄丢了,等了好几天,终于答应再寄一个,这次倒是没丢,就是送到邻居家里了,害得我在家里白等了一天,等到晚上才从邻居家拿回来。在Amazon上买了那么多东西,碰到这种情况还是第一次。
不过算是都齐了,来个合影吧。
Saturday, August 19, 2006
家庭影院(一)
家庭间的电视要鸟枪换炮了,换个更大的!新电视就放不进原来房间里预留的放电视的凹进去的地方,估计建筑师都没想到现在的电视怎么都这么大呢。
电视没有了,那么凹进去的地方放点什么呢?当然要充分利用空间,放个柜子,搭个架子吧。可是以我们的动手能力,自己做是不太现实的,最后恐怕是劳命伤财。找人定做肯定大小最合适,只是这里人工贵,连工带料,肯定在1000美刀以上,自己也要操心。买现成的话,能找到长、宽、高都合适的,恐怕也是奇迹。DD在把宜家的购物手册快要翻破的时候,终于找到一款为厨房设计的橱柜,三个放在一起,宽度、深度都比较合适,不过WW对于DD的设计还半信半疑,主要是他缺乏想象力。做出来就知道了。
电视搬走了,这里显得空荡荡的。
这是刚买回来的三个橱柜。橱柜是我们自己用我家大车从宜家运回来的,后盖都盖不上了。每个橱柜的包装都很重,到家以后,采用化整为零的办法,把它们都搬回家里,反正是要重新组装的。
柜子搭好了,三个橱柜连成一个整体。没有门是不是也不错,只是不能在里面乱堆东西。因为门是和柜子分开买的,每个60美刀,我劝WW把门退了,省120美刀。
WW还是喜欢有门的,那就装上,不退了。其实要是一开始没买门,也就不惦记了。
这是把腿给挡住,现在看起来想个家具了。
东西都摆上了,以后还有潜力。
东西刚摆进去还是很整齐的,可以敞开大门请大家参观。
家庭影院的一期工程圆满结束,家庭影院现在是万事具备,只欠东风,没有电视!
电视没有了,那么凹进去的地方放点什么呢?当然要充分利用空间,放个柜子,搭个架子吧。可是以我们的动手能力,自己做是不太现实的,最后恐怕是劳命伤财。找人定做肯定大小最合适,只是这里人工贵,连工带料,肯定在1000美刀以上,自己也要操心。买现成的话,能找到长、宽、高都合适的,恐怕也是奇迹。DD在把宜家的购物手册快要翻破的时候,终于找到一款为厨房设计的橱柜,三个放在一起,宽度、深度都比较合适,不过WW对于DD的设计还半信半疑,主要是他缺乏想象力。做出来就知道了。
电视搬走了,这里显得空荡荡的。
这是刚买回来的三个橱柜。橱柜是我们自己用我家大车从宜家运回来的,后盖都盖不上了。每个橱柜的包装都很重,到家以后,采用化整为零的办法,把它们都搬回家里,反正是要重新组装的。
柜子搭好了,三个橱柜连成一个整体。没有门是不是也不错,只是不能在里面乱堆东西。因为门是和柜子分开买的,每个60美刀,我劝WW把门退了,省120美刀。
WW还是喜欢有门的,那就装上,不退了。其实要是一开始没买门,也就不惦记了。
这是把腿给挡住,现在看起来想个家具了。
东西都摆上了,以后还有潜力。
东西刚摆进去还是很整齐的,可以敞开大门请大家参观。
家庭影院的一期工程圆满结束,家庭影院现在是万事具备,只欠东风,没有电视!
Monday, November 29, 2004
Christmas in a Bag
No wrapping paper, no ribbon, no bow for this Christmas. I made those flannel bags to hold Christmas goodies. They are soft and warm, extreme suitable for the snowy winter, and it is used for other purpose after Christmas, no waste at all!
The material costs $5.00 and it took me 4- 5 hours to put them together.
Tuesday, September 21, 2004
Garage Makeover Continued ...
Monday, August 23, 2004
Sunday, August 22, 2004
More Toss Pillows
Monday, August 09, 2004
Pillow #1, #2
Haha, this is my sewing project #2: Toss Pillows. I am planning to redo all existing 8 pillows, hope I will finish them soon, otherwise, they will never be finished.
The goals of the projects are:
- Add colors to the family room.
- Washable pillow cover, creating separated pillow liner.
- Re-use existing pillow material and fabric if possible, buy new fabric if needed.
Dissemble: it doesn't require much skills, but still time consuming... make it very good time-killer while watching TV.
Assemble: things start to get complicated here. First, it took several trips to the fabric store (Joann Fabric and Crafts) for people like me having problem on decision making. The fabric can be expensive, $7 to $20 per yard. The zipper costs $1.59 for 12" one. I also get some muslin for making the liner for the fillings.
It takes some practices to get the things right. Here are the ones I made so far:
- Pillow #1 (left): this one matches the water heater curtain and seat cushion. The fabric on the back side of the pillow uses the fabric from the blue pillow, inside out, since the color of the outside is faded a little. The piping reuses the one from the yellow pillow. Total cost: $1.59 (zipper) + $0.50 (liner) = $2.09.
- Pillow #2(right): the front uses the fabric I bought yesterday, the remaining are the same as the pillow #1. Total cost: $1.75(fabric) + $1.59 (zipper) + $0.50 (liner) = $3.84.
Sunday, July 25, 2004
New Slipcover
After I start sewing, QH wants to have "new" sofa set, i.e. the new covers for the sofa/loveseat. The existing cover is not removable, so it has not been maintained well in the past 6 years. And under the California sunshine, the color has faded quite bit. It is time to get new cover.
I get some books about DIY slipcover from the library, I think it is too ambious for me to make the slipcover myself based on my current sewing skill. And the fabric are expensive here, I guess it is better off for me just get the slipcovers from the store directly.
I did some research at surefit.com at home and tried to convince QH that the slipcover will fit since it is called surefit. At least we decide to give it a try. We planned to the local store Linen 'n Thing at the weekend, so in case it doesn't fit, it will be easily to return.
After some discussion and walking (we also checked out the Bed Bath and Beyond across the street), we finally agreed on one (Champagne), even though it is far from the perfect one in my mind, I hope I can work with it. The most important thing comparing to the existing cover is this one is really stain-resistant!!! Hope it will live a long long life. Total Cost : ($70+$80) - 20% = $120 + tax. With $120, I am not sure whether I can get the fabric if i did the slipercover myself, a lot of time and stress are saved too!
Put it on is not hard, but it takes sometime to make it look good, like the picutures on surefit.com. Tuck, tuck, tuck... and you will get there eventually if the shape of the sofa is not too odd. WARNING: most of hardwork will go down the drain if you try to sit on it. It makes to realize that the pretty picture is taken before anyone sitting on it. So in normal situation, it will NOT be picture-prefect!
The picture above is taken with some old toss pillows. It seems a little bit dark for me, maybe it is the lighting in the room, I need to re-work the pillows to add more color for the room.
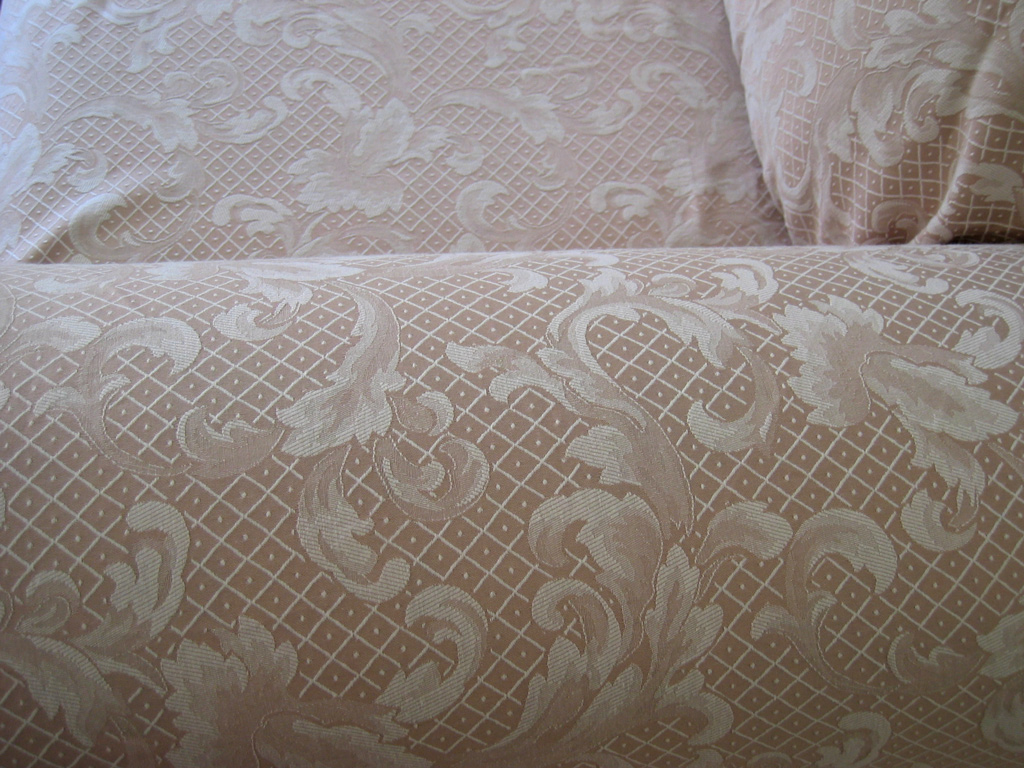
The picture below shows the details of the fabric.
Saturday, July 24, 2004
Sunday, July 04, 2004
Garage Makeover - The Seat Cushion
This time is about the cushion, not the bench.
Even though this cushion is far from perfect, you can't even take a closer look at it, I am still very proud of myself. This is my first sewing project, EVER! I made it!
I have no idea about sewing before, even though i have a sewing machine at home amd i watched my mom sewing from very young age. Sewing is always very intimdating to me for some reason, maybe it is the old sewing machine and I was always afraid that the needle was going to be broken.
Now I have a large piece of fabric at home, and i need to make some use of it. I though making a seat cushion should be really cool, considering i ready have a sewing machine, it is not much to be invested in the project. I got a few(about 10) sewing books from the library, picked a style i like followed the step-by-step instructions, finally i made it.
Well, it is not really that easy. First, i need to learn how to use the sewing machine. I have to say this sewing machine is definitely not dewing-dummy friendly. It took almost two hours to get everything in place and ready to sew. Of course, I have no idea what i am doing, all i have is the instrcution manual, which is for people know how to sew. I am so afraid that i am going to do something stupid to break the machine, smokes coming from the machine. Luckily this sewing machine is quite durable, it still functions quite well after my "abuse".
Secondly, you have let the sewing machine do the things you want. I will never imagine how hard it is to stitch a straight line. The speed of the machine seems out of control to me, it will go from 0 to 100 in one second, I just hope my car do not that my sewing machine. I know, i know, it takes time, patient and practices to get there, i just learned all the lessons the hard way.
Eventually I am happy about the result. The total cost of the cushion:
- foam: $4.00 x 3 - 40% = $7.20
- batting: $1.00
- zipper: $2.50
- cord for the piping: $4.00
- total: $14.70
Sunday, June 27, 2004
Garage Makeover - The Shoe Bench
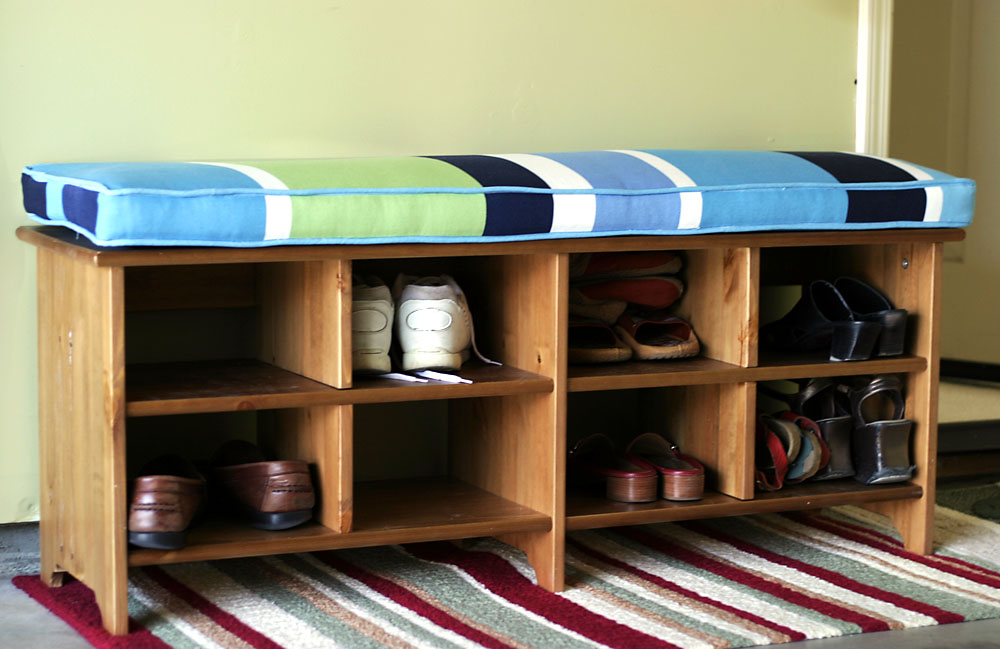
As part of the garage makeover, we want to have simple, functional, yet elegant solution to our shoe storage, at the same time, serving as a bench for taking on/off bulky shoes in winter. As you may know, we only have a narrow space left after cars parked inside the garage, the dimension of the bench will be important for us.
It is hard to imagine that a simple bench can cost $100, not to mention they are either too bulky or too simple for show storage. And apparently we don't have the skills to build one to our specification, we have to keep looking.
Luckily, there is an IKEA store closeby, even though it may not be QH's favoriate store. I did some research on catelog and IKEA's web site before going to the store. I nailed our choice to three:
- KANTRA, Bench: $79.00
- LEKSVIK, Shoe rack: $69.00
- OTTENBY, Bench: $99.00
Our final choice is LEKSVIK! It is not easy decision, it took us two trips to the IKEA store! This may not be our perfect selection, but we can work with it. The only problem I have is the color, it is too mark and it doesn't match our color scheme in the garage at all. I plan to spray paint it in the near future. Watch out for my future posting.
Saturday, June 26, 2004
Garage Makeover - The Water Heater Curtain
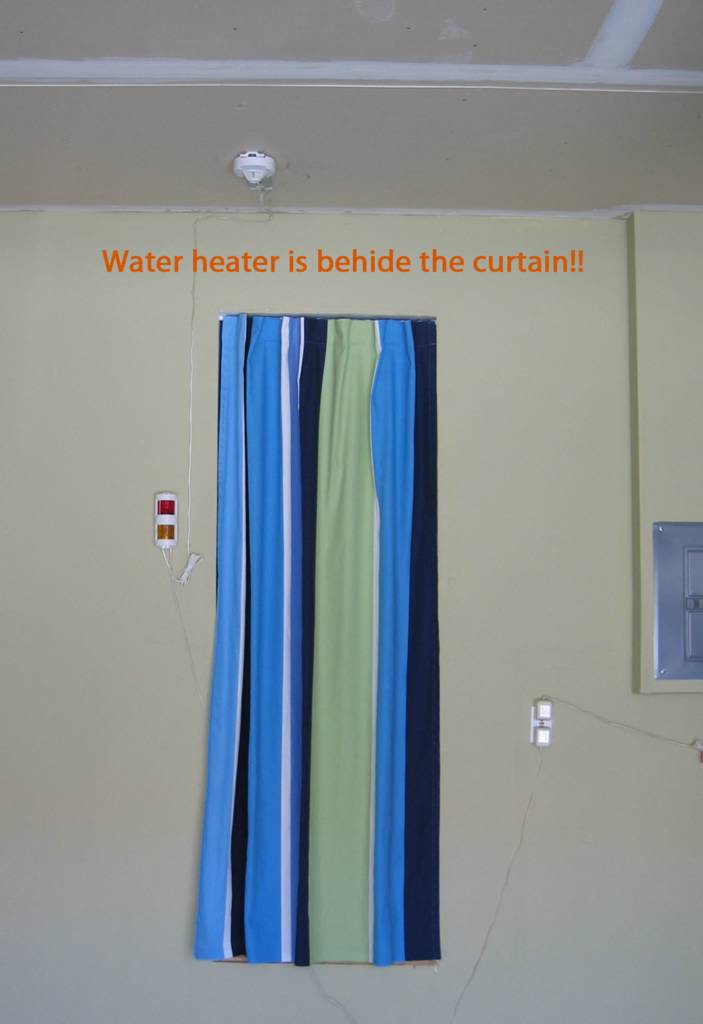
Everything is started from this curtain panel. The original goal is to buy something to cover the ugly water heater. The size of the opening is 39 by 79, the regular window cover such as blinds or rollers can't fit in here and the custom-sized blind would be a over-kill for this situation.
How about hanging curtain panel here? Doesn't it involve sewing? No, I'm a dummy when it comes to sewing, my sewing machine went to early retirement since it hadn't been touched in the past four years. We found these curtain panels at IKEA for $30, I only need one panel while it is sold in pairs. But the best thing about it is that it doesn't need sewing. The iron-on tape is provided to fix the border after I cut the length to size. We bought the simplest rod at Home Depot, hanging it is piece of cake.
But what can I do with rest of fabric? Only 1/3 of fabric is used, the rest will not be wasted, I promised QH.
Monday, June 21, 2004
Garage Makeover - The Shelves
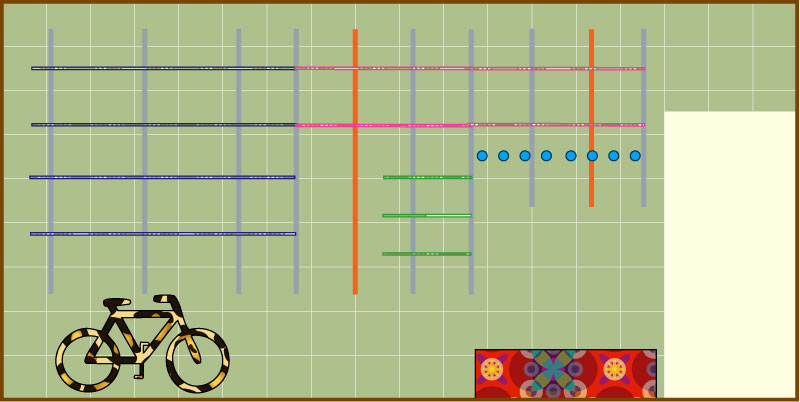
I think I can be a really good project manager. I planned the shelf structures on the computer, wrote down a list of things we need to buy, had an estimate for buying from home depot or the container store, even had the budget approved by QH. Everything was planned during the week, when the weekend came, we were ready to go shopping.
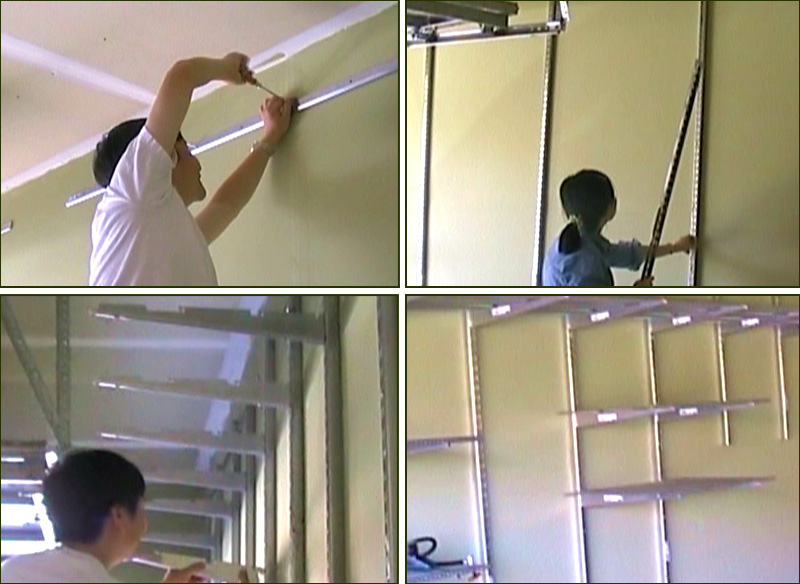
No matter how prepared you are, things just happen. The design was changed during the construction because of the availablity of the studs in the wall. It also took us three trips to the home depot to get everything we need. Even though we ran into some bumps on our way, but in the end, we made it!
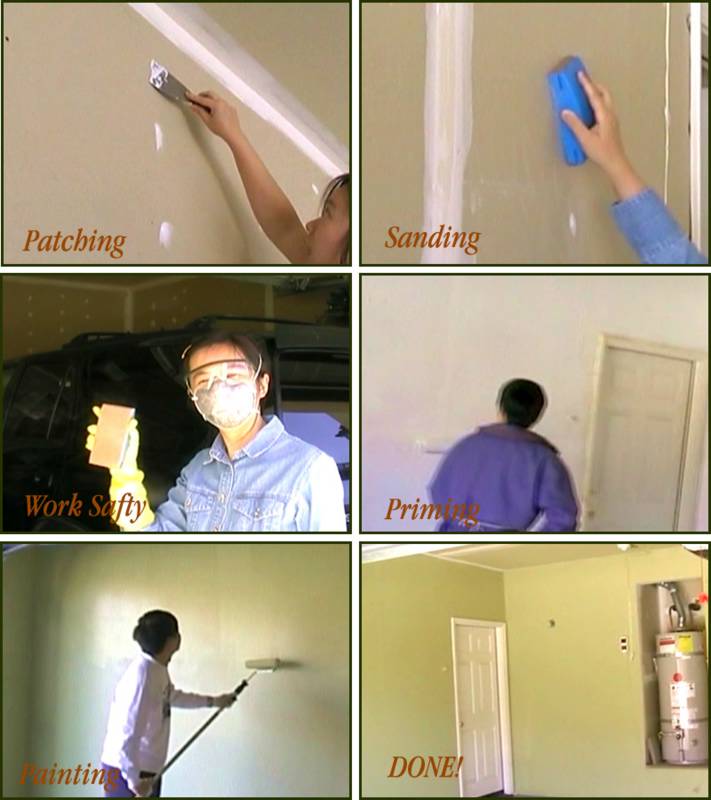
Here are some pictures from the construction. No picture was taken, the images below are captured from video.
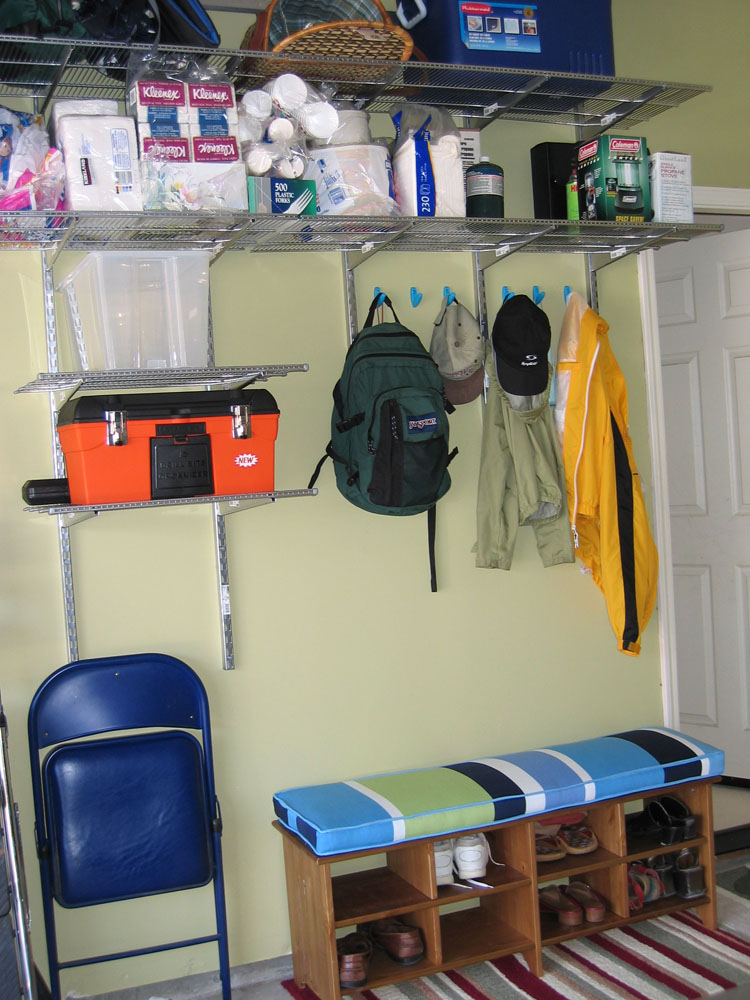
The shelves are put into use quickly.
Monday, June 14, 2004
Garage Makeover - The Wall
This is our first home improvement project, it doesn't cost much, but it was a lot of labor. It took two persons, two weekends and a few trips to the home depot to get the job done. Of course, we learned a lot of lessons after this experience.
It is hard to imagine how ugly the unfinished wall is, and it is hard to imagine we have lived here for six years. After painting the wall, it looks much bigger and brighter, all the effort is well worth it.
Subscribe to:
Posts (Atom)